
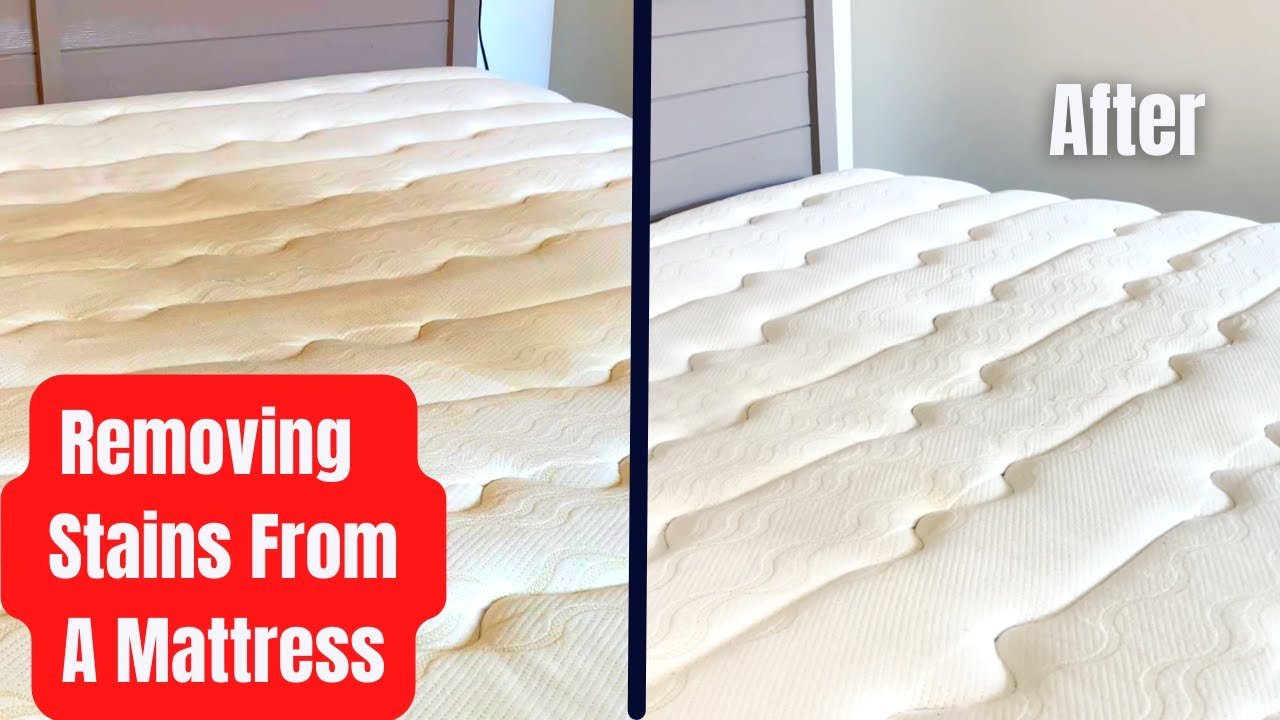
Waking up to a mattress stained with old urine, set-in blood, or yellowed sweat buildup is not just unpleasant — it’s a health hazard and a costly problem if you opt to replace the mattress entirely. Most people assume badly stained mattresses are impossible to clean, but with the right stain-specific methods and supplies, you can restore even the most neglected mattress to a fresh, hygienic state in a single afternoon. In over a decade of residential cleaning and mattress restoration, I’ve worked on hundreds of stained mattresses, from toddler accident emergencies to years of unaddressed sweat and mold growth, and this 7-step guide shares the exact, tested methods that work for every common stain type. We’ll cover pre-cleaning safety, supply lists, stain-specific treatments, deep cleaning best practices, prevention tips, and clear signs you need to call a pro or replace your mattress entirely.
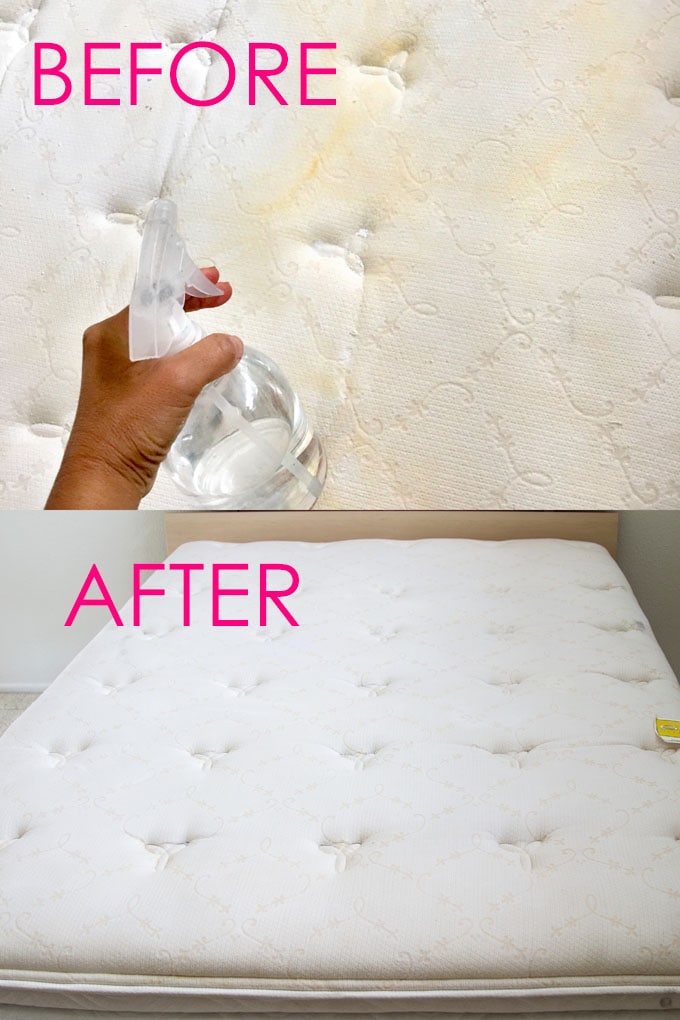
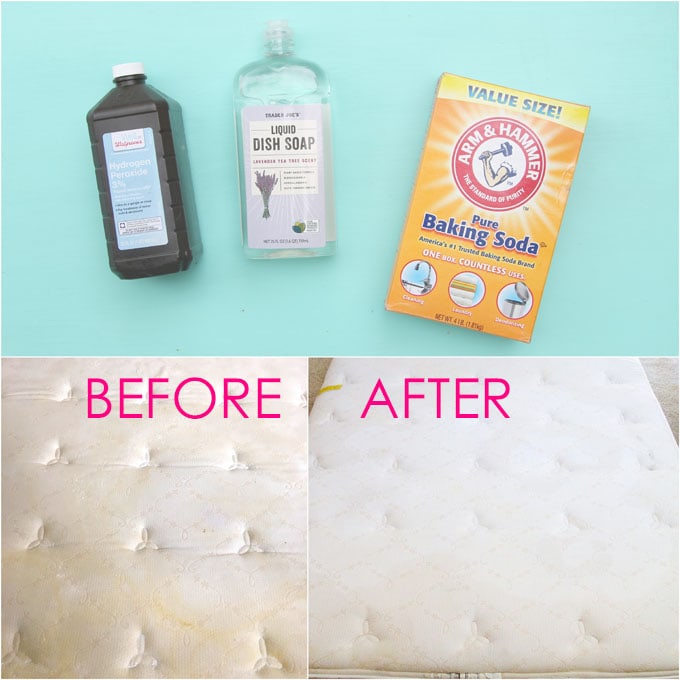 This image shows common stain sources like spilled drinks and body fluids that degrade mattress fabric over time.
Source: apieceofrainbow
This image shows common stain sources like spilled drinks and body fluids that degrade mattress fabric over time.
Source: apieceofrainbow
Why Mattresses Stain (and Why Prompt Cleaning Matters)
Mattresses accumulate stains from four primary sources: body fluids (sweat, urine, blood, saliva), food and drink spills, dirt and dust tracked in from outside, and mold or mildew growth from excess humidity. Left unaddressed, set-in stains degrade foam and coil support materials over time, shorten your mattress lifespan by years, and can harbor bacteria or mold spores that trigger allergies, asthma, and skin irritation. Older stains are also far harder to remove than fresh ones, so acting quickly when a spill happens will save you hours of scrubbing later. Knowing the cause of your stain is the first step to picking the right cleaner and method for full removal. You can also read our guide on how to wash drowsy sleep mask.
Pre-Cleaning Prep: Safety Rules & Essential Supplies
Safety first: Always test any cleaning solution on a hidden seam of the mattress (like the corner near the box spring) 10 minutes before full application to check for discoloration or fabric damage. Wear nitrile gloves to avoid skin contact with enzymes or cleaning agents, and open windows or run a fan for ventilation, especially when using vinegar or hydrogen peroxide. Avoid harsh chemical cleaners like bleach or ammonia, which can discolor fabric, degrade mattress materials, and release fumes unsafe for sleeping on. Stick to gentle, pH-neutral solutions to align with EPA’s safe household cleaning guidelines and avoid respiratory irritation.
A common mistake is using hot water on protein-based stains like blood or urine — heat sets the stain permanently into fabric fibers, making it impossible to remove fully, so always use cold water for these stain types.
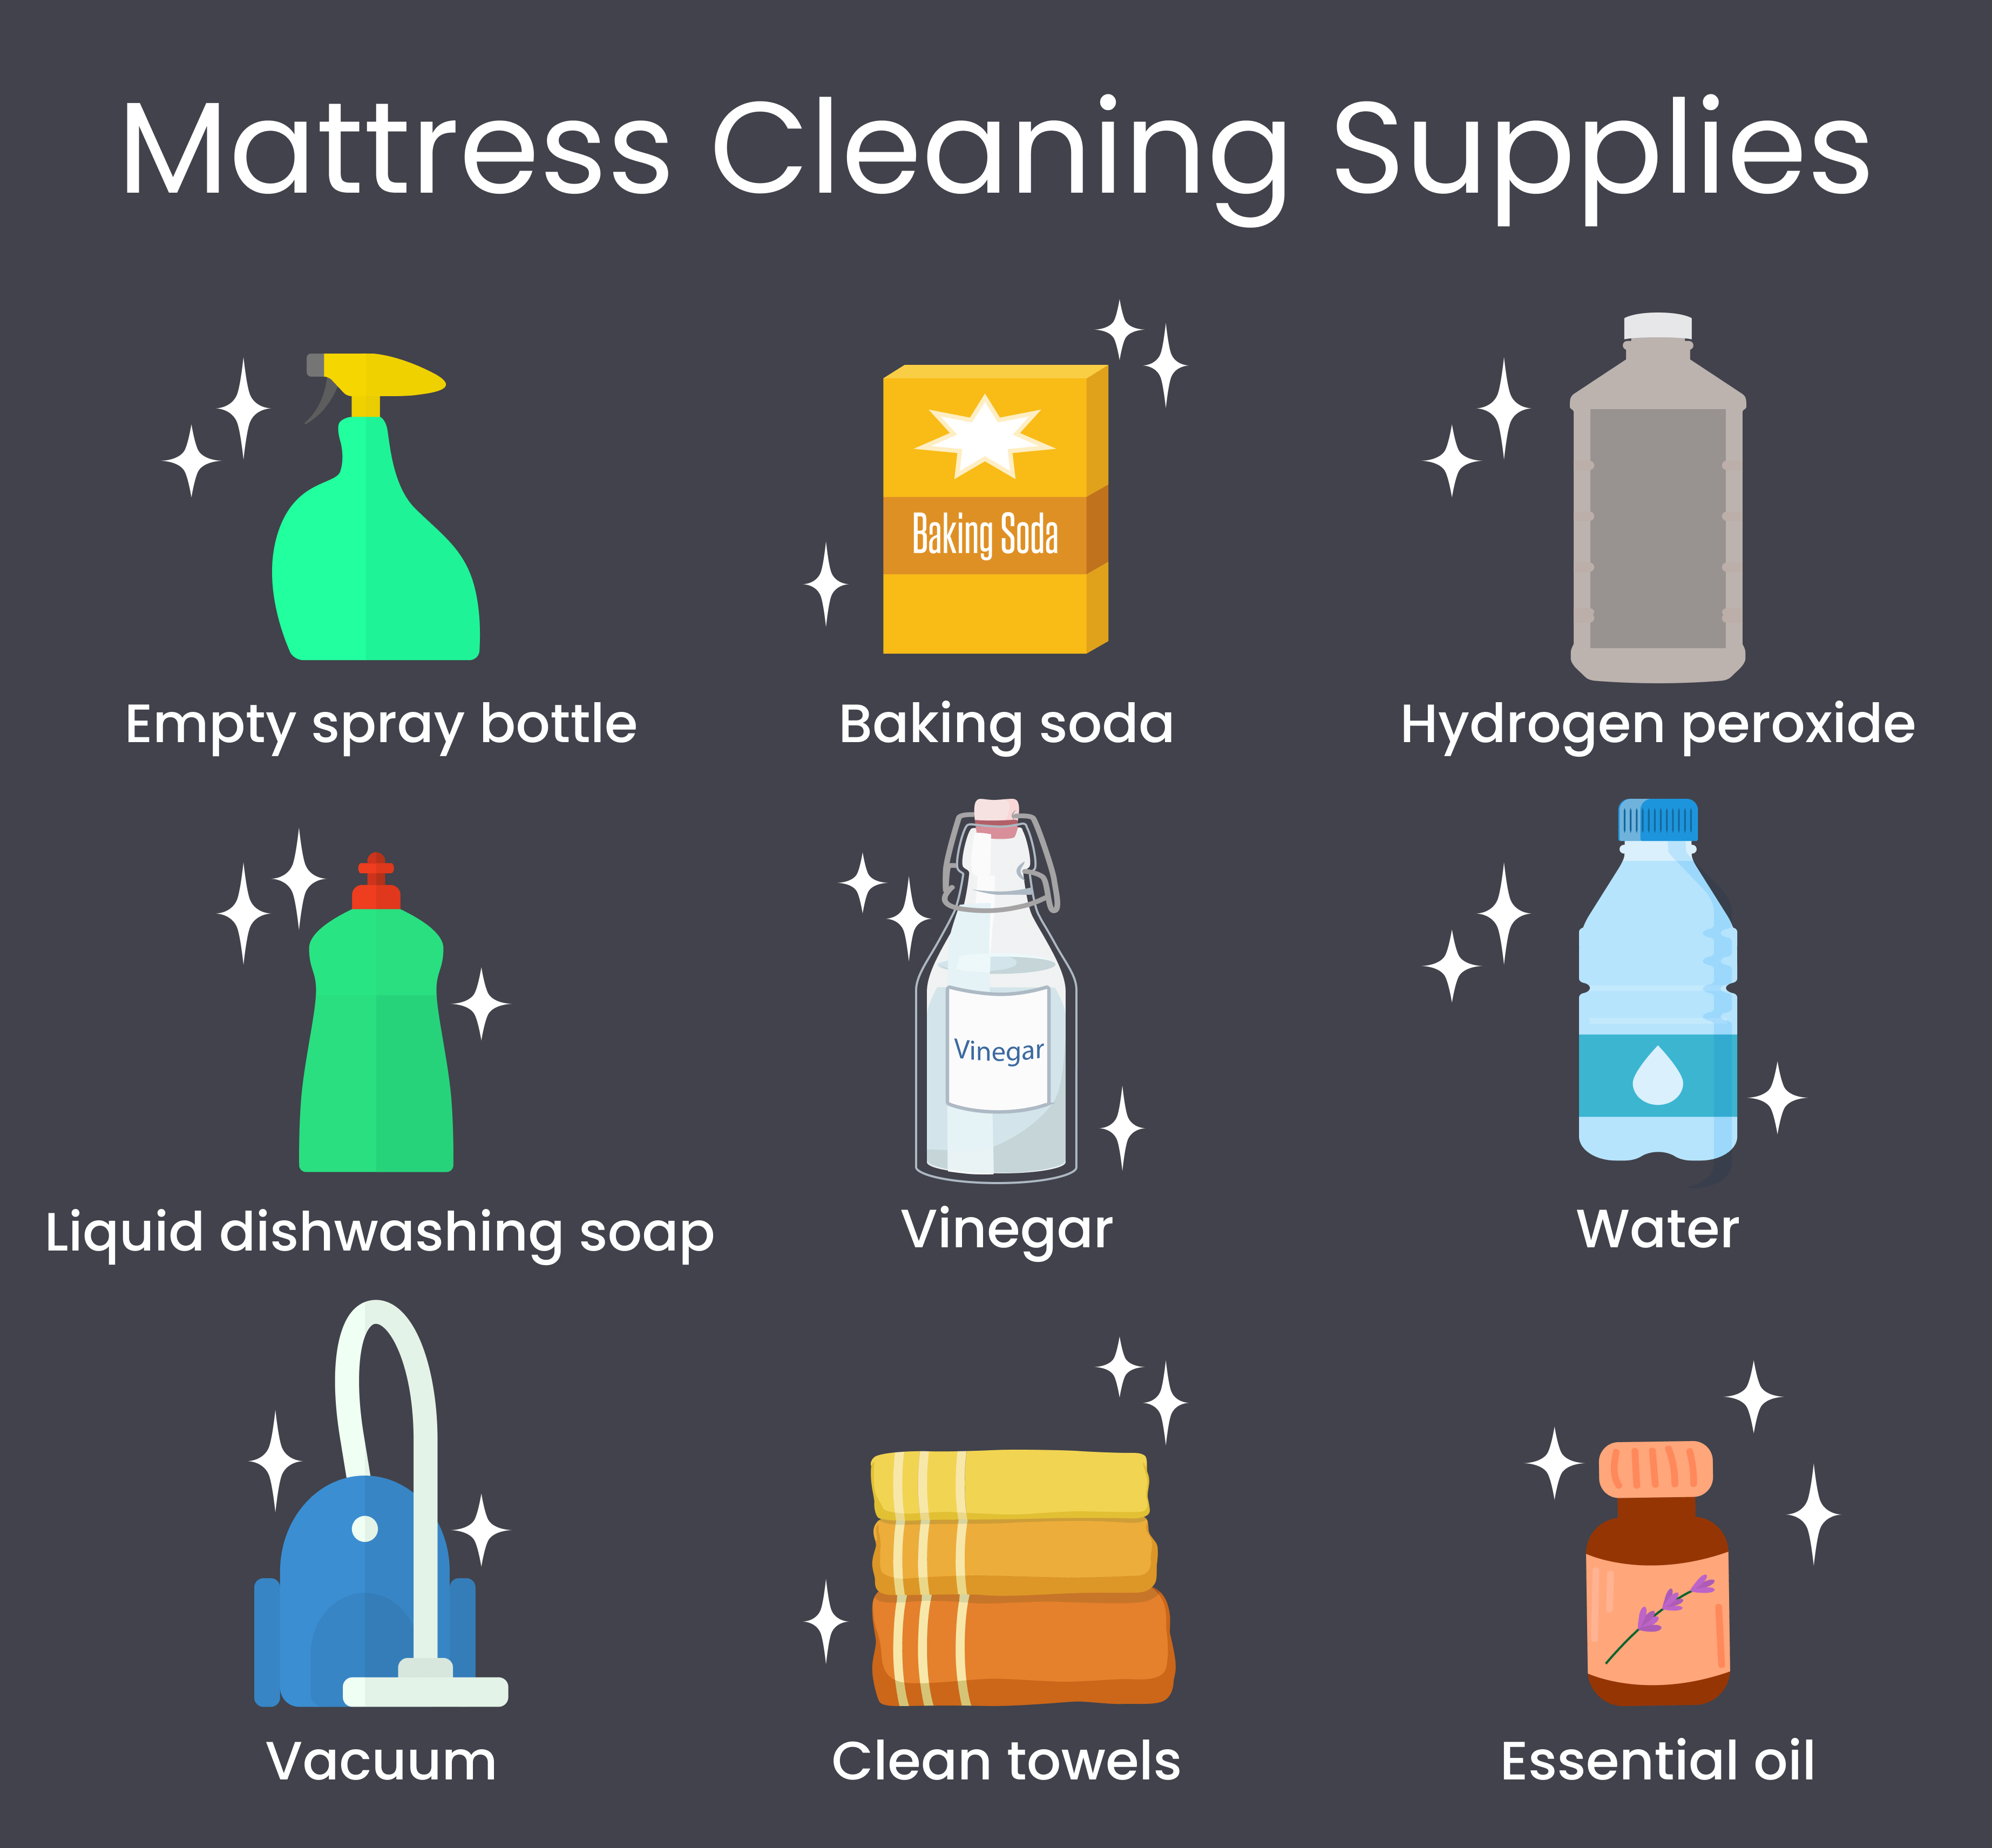
 Infographic listing non-toxic cleaning tools and solutions for mattress care.
Source: saatva
Infographic listing non-toxic cleaning tools and solutions for mattress care.
Source: saatva
Keep these supplies on hand for most stain types:
| Supply | Use Case | Notes |
|---|---|---|
| White microfiber cloths | Blotting all stains | Avoid colored cloths that can transfer dye to the mattress |
| Spray bottle (empty) | Diluting cleaning solutions | Use separate bottles for different solutions to avoid cross-contamination |
| Soft-bristled upholstery brush | Agitating surface stains | Avoid stiff brushes that can tear mattress fabric |
| Enzyme-based cleaner | Organic stains (blood, urine, vomit, sweat) | Look for products labeled "for pet stains" or "organic stain remover" — avoid bleach-based formulas |
| 3% hydrogen peroxide | Whitening yellowed fabric, light organic stains | Test first, as it can bleach colored mattress covers |
| Mild dish soap (fragrance-free) | Non-organic spills (food, drink, grease) | Mix 1 part soap with 2 parts cold water |
| Distilled white vinegar | Neutralizing odors, treating mild mold | Mix 1 part vinegar with 3 parts water for general use |
| Baking soda | Deodorizing, absorbing residual moisture | Use unscented for sensitive sleepers |
| Vacuum with upholstery attachment | Pre-cleaning debris removal, post-cleaning baking soda removal | |
| Fans or dehumidifier | Speeding up drying time | Essential for preventing post-cleaning mold growth |
The 7-Step Badly Stained Mattress Cleaning Guide
Follow these structured steps to tackle even the most stubborn stains without damaging your mattress.
Step 1: Strip the bed and assess the stain
Remove all bedding, mattress toppers, and protectors. Note the stain type (organic vs non-organic), age (fresh vs set-in), and size. If the stain is larger than a dinner plate or has soaked through to the underside of the mattress, you will need to treat both sides. Place towels under the mattress if you’re working with liquid stains to avoid soaking the box spring or floor. Ventilate the room by opening windows or running a fan to reduce fumes from cleaning agents.
Step 2: Vacuum the entire mattress surface
Use the upholstery attachment to remove loose dirt, dust, dead skin cells, and debris from the entire mattress, not just the stained area. This prevents you from grinding dirt into the fabric when you start treating the stain. For mattresses with crevices or tufting, use the crevice tool to get into hard-to-reach areas where dust and allergens accumulate.
Step 3: Blot (don’t rub) excess stain material
For fresh liquid stains, press a clean white microfiber cloth firmly onto the stain to absorb as much liquid as possible. Do not rub, as this pushes the stain deeper into the foam and spreads it to a larger area. Replace the cloth with a fresh one as it becomes saturated, continuing until no more stain transfers to the cloth. For dried stains, first scrape off any solid residue (like dried food or vomit) with a dull butter knife before blotting.
Step 4: Apply the appropriate stain-specific cleaner
For organic stains (blood, urine, vomit, sweat): spray enzyme cleaner directly on the stain, let it sit for 10–15 minutes (per product instructions) to break down proteins and organic matter. For non-organic stains (coffee, soda, grease): dab the area with the mild soap and cold water mixture, then blot. For mold: spray the diluted vinegar solution directly on the affected area, let sit 10 minutes, then blot. Never use undiluted vinegar or bleach on mattress fabric, as it can degrade the material and cause discoloration.
Step 5: Gently agitate the stain
Use a soft-bristled upholstery brush to gently work the cleaner into the fabric fibers in a circular motion. Do not scrub hard, as this can damage the mattress cover and push the stain deeper. After agitating, blot the area again with a clean white cloth to lift the loosened stain material. Repeat steps 4 and 5 for set-in stains, applying more cleaner and blotting until the stain lightens significantly. For stubborn stains, let the cleaner sit for up to 30 minutes before agitating, but do not let the area become saturated.
Step 6: Neutralize odors and absorb residual moisture
Once the stain is lifted, spray the entire affected area (and a 6-inch border around it) with the diluted vinegar solution to neutralize any lingering odors from organic stains. Do not over-saturate — a light mist is enough. Then, sprinkle a generous layer of unscented baking soda over the damp area. The baking soda will absorb residual moisture and trap any remaining odor molecules. Let the baking soda sit for at least 4 hours, but ideally overnight, for maximum effectiveness. If you have pets or sensitive sleepers, you can leave it on for up to 24 hours.
Step 7: Vacuum and dry the mattress fully
Use the upholstery attachment to vacuum up all the baking soda, making sure to get into all crevices and seams. Then, air-dry the mattress completely before remaking the bed. The fastest drying method is to place the mattress in direct sunlight for 4–6 hours on a dry, non-humid day — UV light also helps kill any remaining mold or bacteria. If you can’t move the mattress outdoors, run fans directed at the damp area for 24 hours, and use a dehumidifier in the room to speed up the process. Crucial note: never remake the bed or put a mattress topper on until the mattress is completely dry to the touch, and even then, wait an extra 2 hours to ensure no moisture is trapped underneath. Trapped moisture leads to mold growth, which is far harder to remove than surface stains.
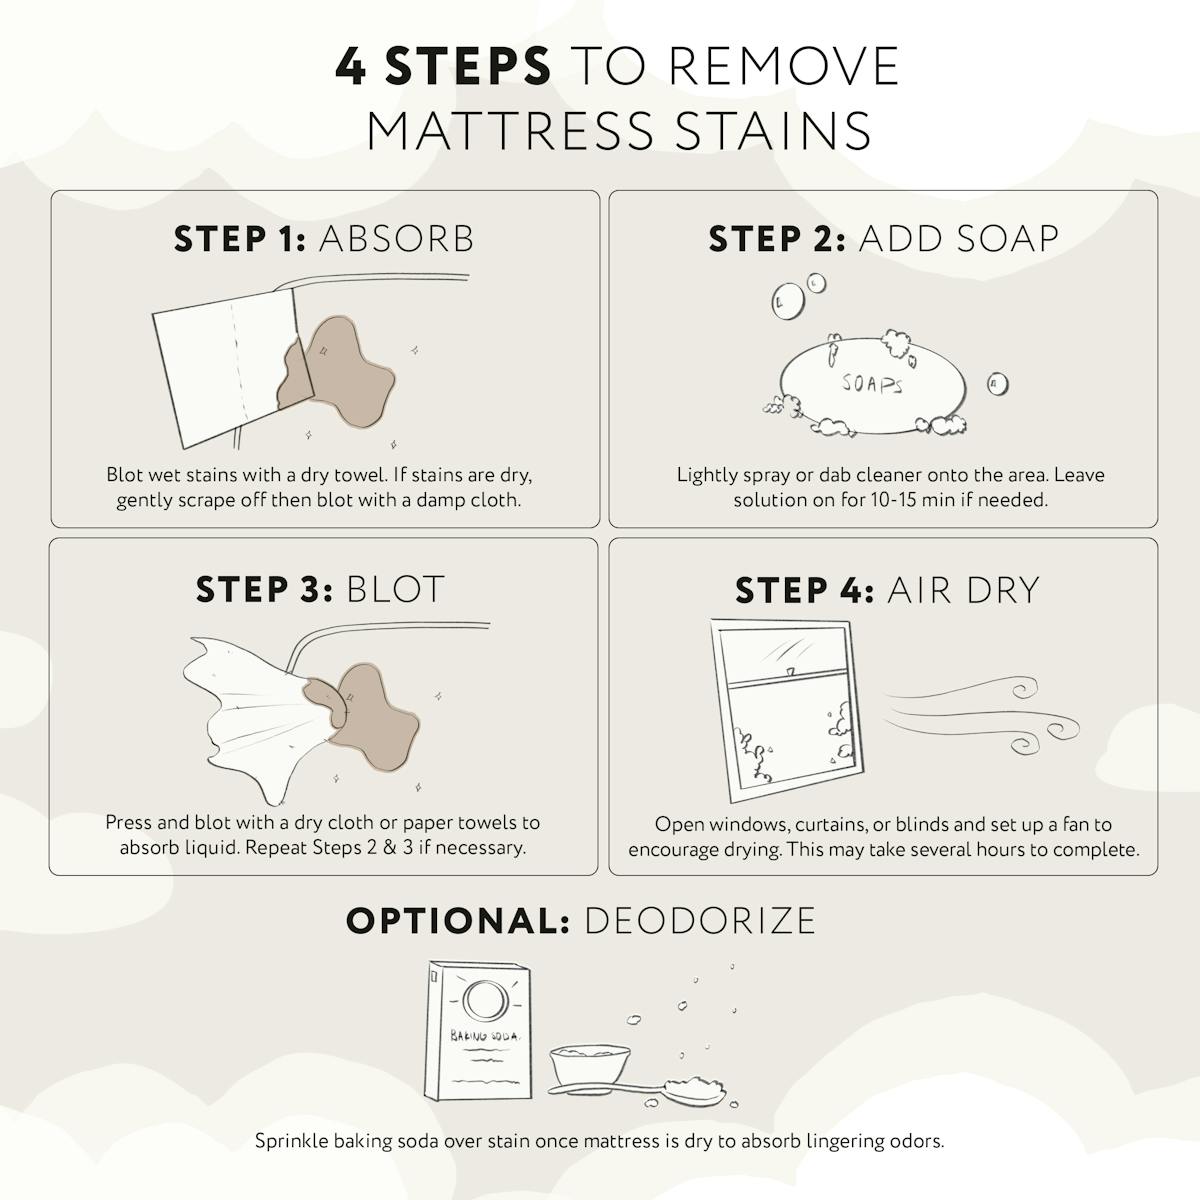
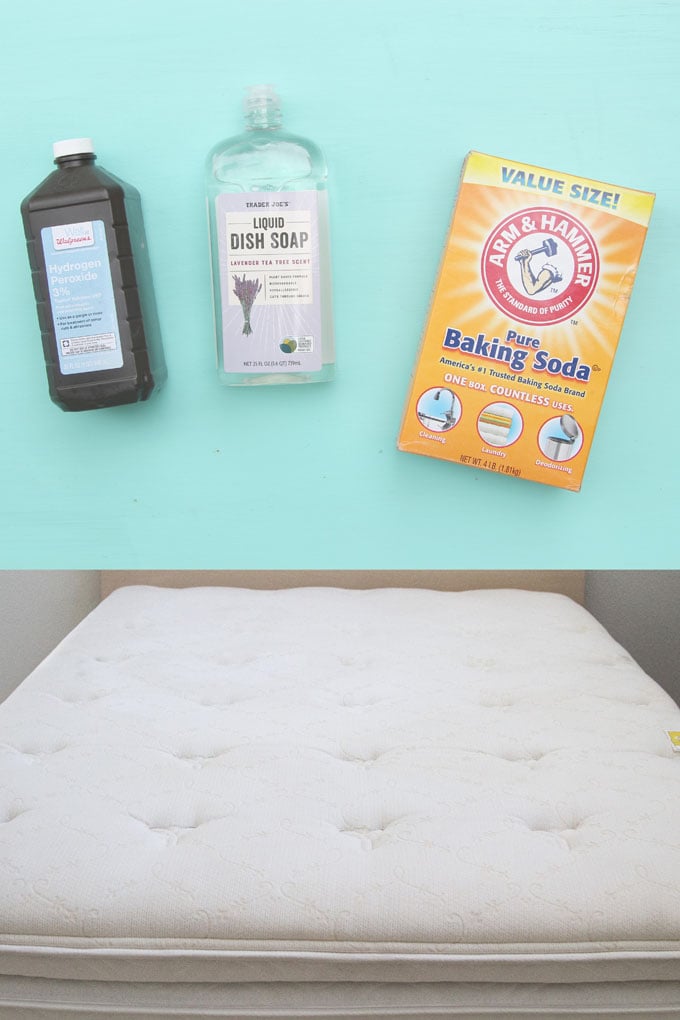
 Visual breakdown of the blotting, cleaning, and drying process for stained mattresses.
Source: apieceofrainbow
Visual breakdown of the blotting, cleaning, and drying process for stained mattresses.
Source: apieceofrainbow
Stain-Specific Treatment Cheat Sheet
Different stains require tailored treatments for full removal. Use this quick reference to pick the right method for your specific stain:
| Stain Type | Recommended Cleaner | Special Tips |
|---|---|---|
| Fresh blood | Cold water + enzyme cleaner | Never use hot water, as it sets the protein stain. For set-in blood stains, make a paste of baking soda and cold water, apply to the stain, let sit 30 minutes, then blot and rinse with cold water. |
| Urine (human or pet) | Enzyme cleaner + baking soda | For set-in urine stains, first blot as much liquid as possible, then apply enzyme cleaner, cover with plastic wrap to keep it damp, and let sit 2 hours before blotting. Avoid ammonia-based cleaners, as they attract pets to re-mark the area. |
| Sweat and body oil | Mild dish soap + cold water + baking soda | For yellowed sweat stains, mix 1 part hydrogen peroxide with 2 parts water, test on a hidden area first, then apply to the stain, let sit 10 minutes, blot, and rinse with cold water. |
| Food and drink spills | Mild dish soap + cold water | Blot up excess liquid first, then apply the soap mixture. For greasy stains (like pizza grease), add a drop of rubbing alcohol to the soap mixture to cut through the oil. |
| Mold and mildew | Diluted white vinegar + sunlight | For small, surface-level mold spots, spray vinegar, let sit 10 minutes, scrub gently with a soft brush, then dry in direct sun. If mold covers more than 10% of the mattress surface, do not attempt to clean it — mold spores can spread deep into foam, and replacement is the safest option for your health. |
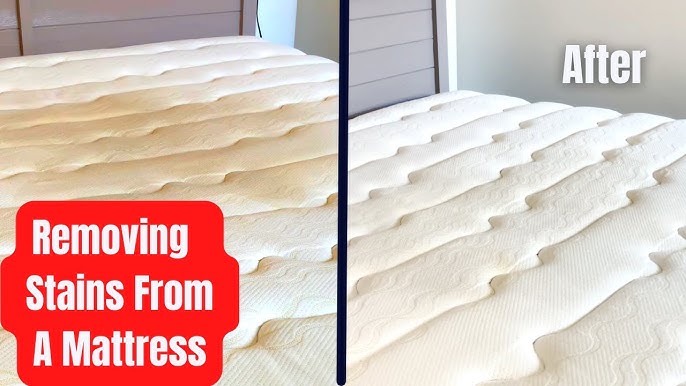 Comparison of treatment methods for blood, urine, sweat, and mold stains.
Source: youtube
Comparison of treatment methods for blood, urine, sweat, and mold stains.
Source: youtube
A common mistake I see in DIY mattress cleaning is using bleach or harsh chemical cleaners on mattress fabric. These can discolor the cover, degrade the material over time, and release fumes that are unsafe for sleeping on. Stick to the gentle, pH-neutral solutions listed above for safe, effective results.
Deep Cleaning & Drying Best Practices
If you have widespread odors, multiple set-in stains, or haven’t deep cleaned your mattress in over a year, a full deep clean will remove built-up dirt, dead skin cells, and odors that regular spot cleaning can’t address. Follow these steps for safe, effective deep cleaning:
- Vacuum the entire mattress top, sides, and underside (if accessible) to remove all loose debris.
- Treat all visible stains with the appropriate cleaner from the cheat sheet above.
- For non-memory foam mattresses (innerspring, hybrid, latex): you can use a steam cleaner on the lowest heat setting, passing it slowly over the mattress surface without saturating the fabric. For memory foam mattresses: skip steam entirely, as water trapped in foam leads to mold growth. Instead, mist the entire surface lightly with a 1:1 water and white vinegar solution, then blot with a clean cloth. If you use a plush topper for extra comfort, make sure you’re following proper guidelines for letting bedding layers air out after cleaning to avoid trapping moisture against the mattress.
- Sprinkle a thin, even layer of baking soda over the entire mattress surface, not just stained areas, to absorb residual odors and moisture.
- Let the baking soda sit for at least 4 hours, or overnight if possible.
- Vacuum up all baking soda thoroughly.
- Dry the mattress completely: for innerspring/hybrid mattresses, you can stand it upright against a wall in a sunny, well-ventilated room for 4–6 hours. For memory foam, lay it flat with fans directed at it for 24 hours, and use a dehumidifier in the room to reduce humidity.
If you’re unsure if the mattress is fully dry, press a clean dry cloth firmly into the fabric. If any moisture transfers to the cloth, keep drying. A mattress that stays damp for more than 24 hours after cleaning will develop mold, which poses serious health risks.
 Proper drying with fans and sunlight prevents post-cleaning mold growth.
Source: apieceofrainbow
Proper drying with fans and sunlight prevents post-cleaning mold growth.
Source: apieceofrainbow
Preventing Future Mattress Stains
Prevention is far easier and cheaper than restoring a badly stained mattress. Follow these steps to keep your mattress fresh for years:
- Use a washable, waterproof mattress protector: this is the single most effective stain prevention tool. Look for protectors made of breathable fabric (like cotton or bamboo) to avoid trapping heat while sleeping. Wash your protector every 2–4 weeks to keep it fresh. If you use a plush topper for extra comfort, regular routine topper cleaning will prevent it from absorbing spills that seep through to your mattress. If you have a feather topper, proper maintaining a feather topper will keep it from holding onto moisture and odors that transfer to your mattress.
- Avoid eating or drinking in bed: this eliminates the risk of food, drink, and grease spills that are hard to remove from fabric.
- Address spills immediately: even with a protector, blot any fresh spills as soon as they happen to avoid them soaking through to the mattress.
- Rotate your mattress every 3–6 months: this distributes wear evenly and prevents indentations that can trap dirt and moisture.
- Control bedroom humidity: keep bedroom humidity between 30–50% to prevent mold and mildew growth. Use a dehumidifier in damp climates or during summer months. If you’re looking for sustainable bedding swaps to reduce moisture buildup, opt for breathable, natural-fiber bedding over synthetic options.
- If you have a damaged topper that’s no longer protecting your mattress, address it quickly: learn fixing a damaged topper to avoid exposing your mattress to spills and stains.
- If your current mattress pad is worn out and no longer repelling liquids, it’s time for a replacement — check our guide to knowing when to replace worn bedding layers to avoid unnecessary mattress stains.
 Waterproof mattress protectors are the most effective stain prevention tool.
Source: laylasleep
Waterproof mattress protectors are the most effective stain prevention tool.
Source: laylasleep
When to Call a Professional or Replace Your Mattress
While most stains can be removed with DIY methods, there are cases where professional help or replacement is the only safe option:
- Call a professional cleaner if: the mattress is a high-end luxury model you don’t want to damage, stains cover more than 30% of the surface, or mold/mildew growth is present but limited to small spots. Professional cleaners have industrial-grade extraction tools that remove moisture safely without saturating foam, and specialized cleaners that won’t damage mattress materials.
- Replace the mattress entirely if: mold covers more than 10% of the surface, odors persist after 2 full deep cleaning attempts, the mattress is over 7–10 years old (the average lifespan of a quality mattress) and has sagging or broken coils that cause pain, or stains have soaked through to the underside of the mattress and can’t be fully removed. Sleeping on a moldy or heavily stained mattress can trigger allergies, asthma, and respiratory issues, per CDC’s mold safety recommendations, so it’s not worth the health risk to try to save it.
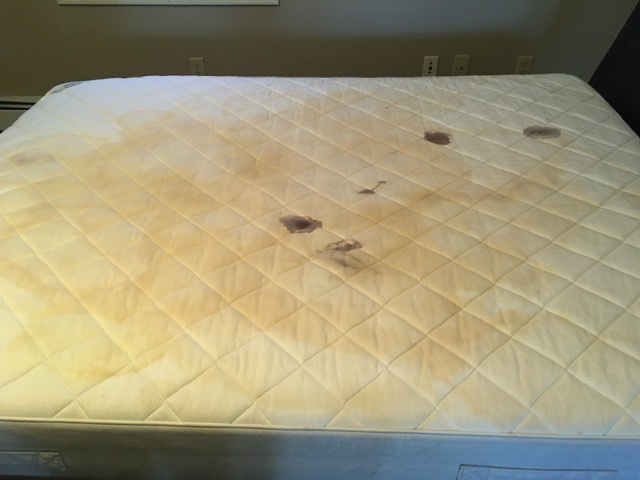
 Widespread mold or deep-set stains often require professional intervention or full replacement.
Source: apieceofrainbow
Widespread mold or deep-set stains often require professional intervention or full replacement.
Source: apieceofrainbow
Frequently Asked Questions
Can I use bleach to clean a badly stained mattress?
No. Bleach discolors most mattress fabrics, degrades the material over time, and releases harsh fumes that are unsafe for sleeping on. Stick to gentle, pH-neutral cleaners like enzyme spray, vinegar, and mild dish soap for safe, effective results.
How do I remove old, set-in urine stains from a mattress?
For set-in urine stains, first blot the area with a clean cloth to remove excess moisture, then apply an enzyme cleaner liberally, cover the area with plastic wrap to keep it damp, and let it sit for 2–3 hours. Blot up the excess cleaner, then sprinkle baking soda over the area, let sit overnight, and vacuum up the next day. For very old stains, you may need to repeat the process 2–3 times to fully lift the stain and odor.
Will steam cleaning damage my mattress?
It depends on the mattress type. Innerspring, hybrid, and latex mattresses can tolerate low-heat steam cleaning if you avoid saturating the fabric. Memory foam and pillow-top mattresses should never be steam cleaned, as water trapped in the foam will lead to mold growth. Always check your mattress manufacturer’s care instructions before using a steam cleaner.
How long does it take for a mattress to dry after cleaning?
Drying time depends on the mattress type, humidity, and airflow. In ideal conditions (direct sun, low humidity, fans running), a mattress will dry in 4–6 hours. In damp, humid conditions, it can take 24–48 hours. Never remake the bed or put a topper on until the mattress is 100% dry to the touch, and wait an extra 2 hours to ensure no moisture is trapped underneath.
Can I clean a mattress with baking soda alone?
Baking soda is great for deodorizing and absorbing light moisture, but it won’t lift set-in stains from organic materials like blood or urine. For best results, use baking soda as the final step in your cleaning process, after you’ve treated the stain with an appropriate cleaner.
Final Thoughts
Cleaning a badly stained mattress doesn’t have to be a daunting task — with the right supplies, stain-specific treatments, and patience, you can restore even the most neglected mattress to a fresh, clean state without spending hundreds on a replacement. The key takeaways to remember:
- Always test cleaning solutions on a hidden area first to avoid fabric damage
- Blot stains instead of rubbing to prevent them from spreading deeper into the foam
- Never use hot water on protein-based stains like blood or urine, as it sets the stain permanently
- Allow the mattress to dry completely for 24+ hours before remaking the bed to avoid mold growth
- Invest in a waterproof mattress protector to prevent future stains from forming in the first place
If you’ve tried these steps and your mattress still has lingering odors or visible stains, don’t hesitate to reach out to a professional cleaning service, or consider replacing the mattress if it’s over 7 years old or has widespread mold growth. For more tips to keep your sleep space fresh and healthy, check out our guides to proper protector care and extending your bedding’s lifespan to protect your investment for years to come.
Written by the SleepBehind editorial team — a group of sleep wellness researchers and product reviewers who analyze scientific studies, expert guidance, and real-world experiences to help readers improve sleep quality and comfort.