If you’ve ever woken up with a red strap imprint on your face, light seeping in at the nose bridge, or fabric that irritates sensitive skin, you know not all sleep masks are built the same. As someone who has sewn over 50 DIY sleep masks for personal use, friend gifts, and local craft fairs, I’ve tested dozens of fabric combinations, patterns, and fill options to find what actually blocks light, stays comfortable all night, and holds up to repeated washes. This simple DIY guide covers both sewn and no-sew methods, fabric science, weighted options for restless nights, and troubleshooting for common fit issues—no advanced sewing skills required. By the end, you’ll have a custom mask tailored to your face shape, sleep preferences, and skin needs, all for a fraction of the cost of store-bought premium options. Even small amounts of ambient light can suppress melatonin production and disrupt your sleep cycle, per evidence-based sleep hygiene guidance from the CDC.
Why Make Your Own Sleep Mask Instead of Buying Store-Bought?
Store-bought sleep masks are convenient, but they rarely fit perfectly or meet specific comfort needs. Making your own mask offers tangible benefits that make the small time investment worth it:
- Custom fit: Most store masks use a one-size-fits-all design that leaves gaps for light at the nose bridge or temples. A custom DIY pattern molds to your unique face shape for total light blockage.
- Material control: You can pick hypoallergenic, breathable fabrics if you have sensitive skin, or silk to reduce friction on hair and skin, a small change that supports reducing overnight hair friction and prevents morning bedhead.
- Low cost: A DIY mask costs $3–$8 in materials, compared to $15–$40 for premium store-bought options with similar features.
- Full customization: Add gentle weight for anxiety relief, adjust strap length to avoid ear pressure, or pick fun custom prints to match your style. For people with specific needs like night shift work or side sleeping, a DIY mask can be tailored to solve problems store-bought options ignore.
- Sustainability: Upcycle old t-shirts, pillowcases, or fabric scraps instead of buying new plastic-packaged masks, reducing household waste.
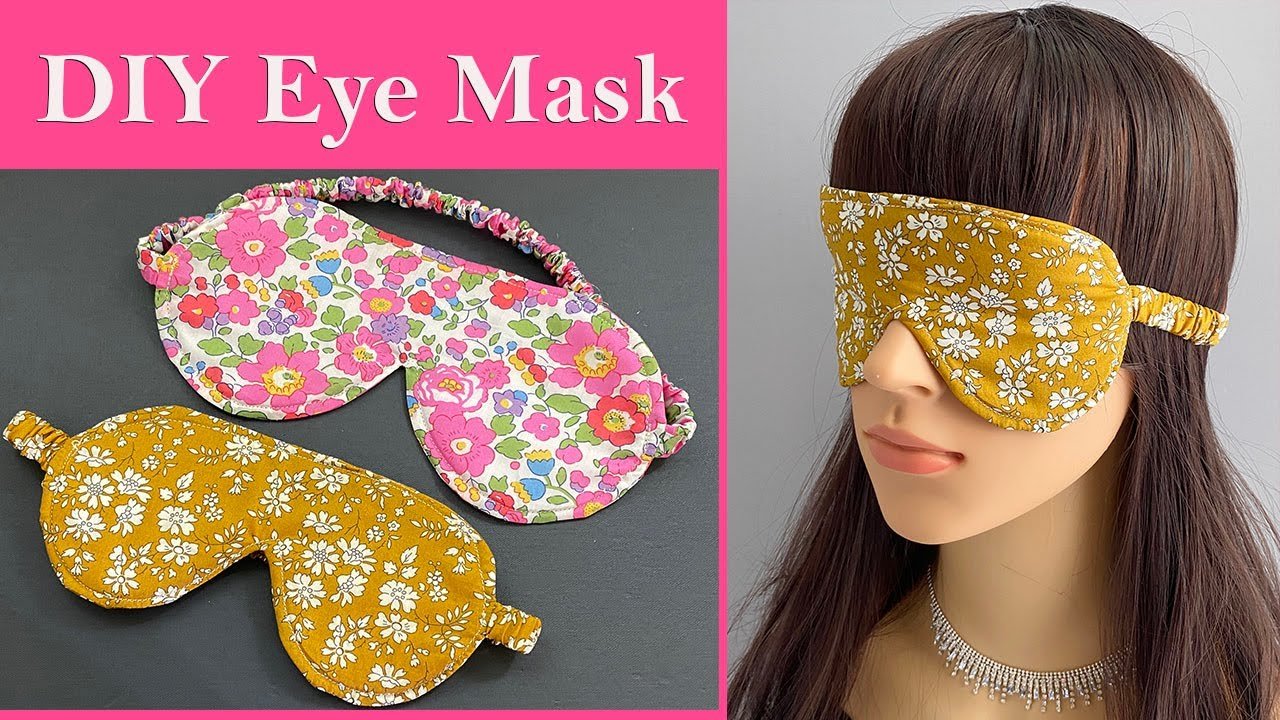
 Custom printed fabrics make DIY sleep masks perfect personalized gifts for loved ones.
Source: youtube
Custom printed fabrics make DIY sleep masks perfect personalized gifts for loved ones.
Source: youtube
Choose the Right Sleep Mask Design for Your Needs
Before you start cutting fabric, pick a design that matches your sleep habits and comfort preferences. The three most common DIY designs each have unique pros and cons:
| Design Type | Best For | Pros | Cons |
|---|---|---|---|
| Flat/unstructured | Hot sleepers, casual home use, beginners | Simple to make, breathable, lightweight | May let in light at the nose bridge if not fitted properly |
| Contoured (with eye cavities) | Side sleepers, people with long lashes, those who hate pressure on eyes | Blocks all light, no pressure on eyeballs, fits face curves better | Slightly more complex to sew, requires foam or extra seam allowance |
| Weighted | People with anxiety, restlessness, or difficulty falling asleep | Gentle pressure calms the nervous system, reduces tossing and turning | Heavier, not ideal for stomach sleepers, requires secure fill pocket to avoid spills |
| For travel, a flat no-sew mask is easiest to pack, while a contoured weighted mask is best for nightly home use. |
Materials and Tools You’ll Need
This short list keeps your project simple and quick, with specific recommendations to avoid common pitfalls:
- Outer fabric (face-side): 1/2 yard of 100% silk charmeuse (gentle on skin, reduces friction), medium-weight cotton (breathable, affordable), or blackout fabric (for maximum light blocking). Avoid stiff canvas or thick fleece, which trap heat and cause sweating.
- Inner lining/backing fabric: 1/2 yard of soft cotton, bamboo jersey, or flannel (for cold climates). This sits against your skin if using weighted fill, so pick a soft, non-irritating option.
- Fill (optional): 4–6 oz of whole flax seeds (for gentle weighted pressure—do not use cracked seeds, as they can leak), 1/4-inch high-density foam (for contoured eye cavities), or thin cotton batting (for soft, unstructured masks). Avoid rice or beans, which can mold when exposed to moisture.
- Strap: 1/4-inch flat no-roll elastic (comfortable, no ear pressure) or 1/2-inch satin ribbon (adjustable, ideal for people with sensitive ears). For long hair, add a 2-inch satin tie to keep the mask from slipping.
- Tools: Sharp fabric scissors, straight pins, fabric marker, measuring tape, seam ripper, iron and ironing board, and either a basic sewing machine or hand-sewing needles (size 9/10) with strong polyester thread. For no-sew methods, add medium-weight fusible interfacing (1/2 yard) or delicate fabric glue, and a low-temperature hot glue gun.
Pro tip: If upcycling old fabric, wash it first to remove residual detergents or softeners that could irritate skin. You can also upcycling household textiles like old flannel sheets or soft t-shirts to cut costs and reduce waste.
 Gather all supplies before starting to avoid interruptions mid-project.
Source: sleepadvisor
Gather all supplies before starting to avoid interruptions mid-project.
Source: sleepadvisor
Step 1: Measure and Create a Custom Pattern
A custom pattern is the difference between a mask that blocks all light and one that leaks at the nose bridge. Follow these steps to draft a pattern fitted exactly to your face:
- Take your measurements: Use a soft measuring tape to measure two key dimensions:
- Width: Across the widest part of your face, from the outer edge of one temple to the other (average adult sizes: small = 5.5–6 inches, medium = 6–6.5 inches, large = 6.5–7 inches).
- Height: From the top of your nose bridge (between your eyebrows) to the top of your cheekbone (average: 3–3.5 inches).
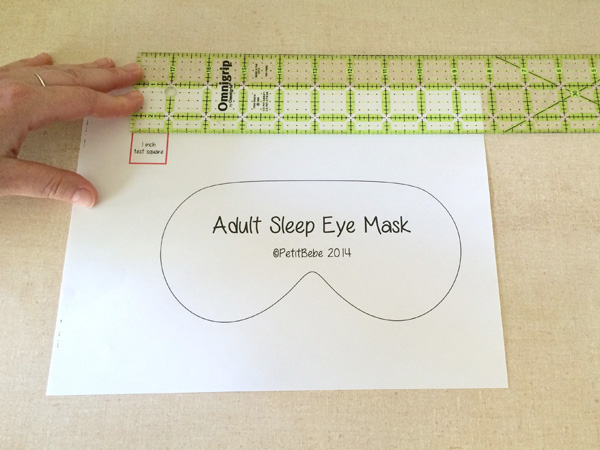
- Draft the pattern: Draw the shape on pattern paper or a plain sheet of paper. Start with a rectangle 1 inch wider and 1 inch taller than your measurements to account for seam allowance. Round the top and bottom edges to match your face’s natural curves, and add a 1/2-inch dip in the center top for the nose bridge. For contoured masks, add two 1/2-inch deep curved cutouts for the eye cavities, spaced 1 inch apart.
- Test the mockup: Cut the pattern out of scrap fabric or paper, hold it to your face, and adjust the curve until it sits flush against your nose bridge and cheekbones with no gaps. The most common mistake here is making the mask too flat—add a gentle curve to follow your face’s natural shape to avoid light leaks, similar to personalizing sleep gear fit for other rest-time essentials.
 Testing a paper mockup ensures the pattern fits your unique face shape before cutting fabric.
Source: youtube
Testing a paper mockup ensures the pattern fits your unique face shape before cutting fabric.
Source: youtube
Step 2: Sew a Durable, Light-Blocking Sleep Mask
Follow these steps for a professional-quality mask that will hold up to years of nightly use:
- Cut your fabric: Cut two identical outer fabric pieces using your pattern, one lining piece, and one fill piece (if using foam or batting). For weighted masks, cut an extra 2×3 inch piece of lining to make a small fill pocket.
- Layer the fabrics: Place the two outer fabric pieces right sides together (printed/pretty side facing inward). Place the lining piece on top of the outer layers, right side facing down. Pin all layers together to prevent shifting while sewing.
- Sew the edges: Sew around the entire perimeter with a 1/2-inch seam allowance, leaving a 2–3 inch gap on one side for turning. For contoured masks, sew a small 1/8-inch seam over the eye cavities first to create raised edges around the eyes, then sew the outer perimeter.
- Trim and turn: Clip small notches into the curved edges (be careful not to cut through your stitches) to reduce bulk. Turn the mask right side out through the gap, using a blunt tool like a chopstick to push out the curved edges. Press the entire mask flat with an iron on a low heat setting, using a pressing cloth for silk to avoid scorch marks.
- Close the gap: Topstitch 1/8 inch from the edge all the way around the mask to close the turning gap and give it a clean, finished look. This also prevents the edges from fraying over time.
- Add the strap: For elastic: cut a 10-inch piece of 1/4-inch flat elastic, sew each end to the side seams of the mask, reinforcing with a box stitch to prevent tearing. For ribbon: cut two 18-inch pieces of satin ribbon, sew one end to each side seam, and tie the other ends at the back of your head for an adjustable fit. For weighted masks: sew the small fill pocket to the inside of the mask, fill with 4–6 oz of whole flax seeds, and sew the pocket shut securely.
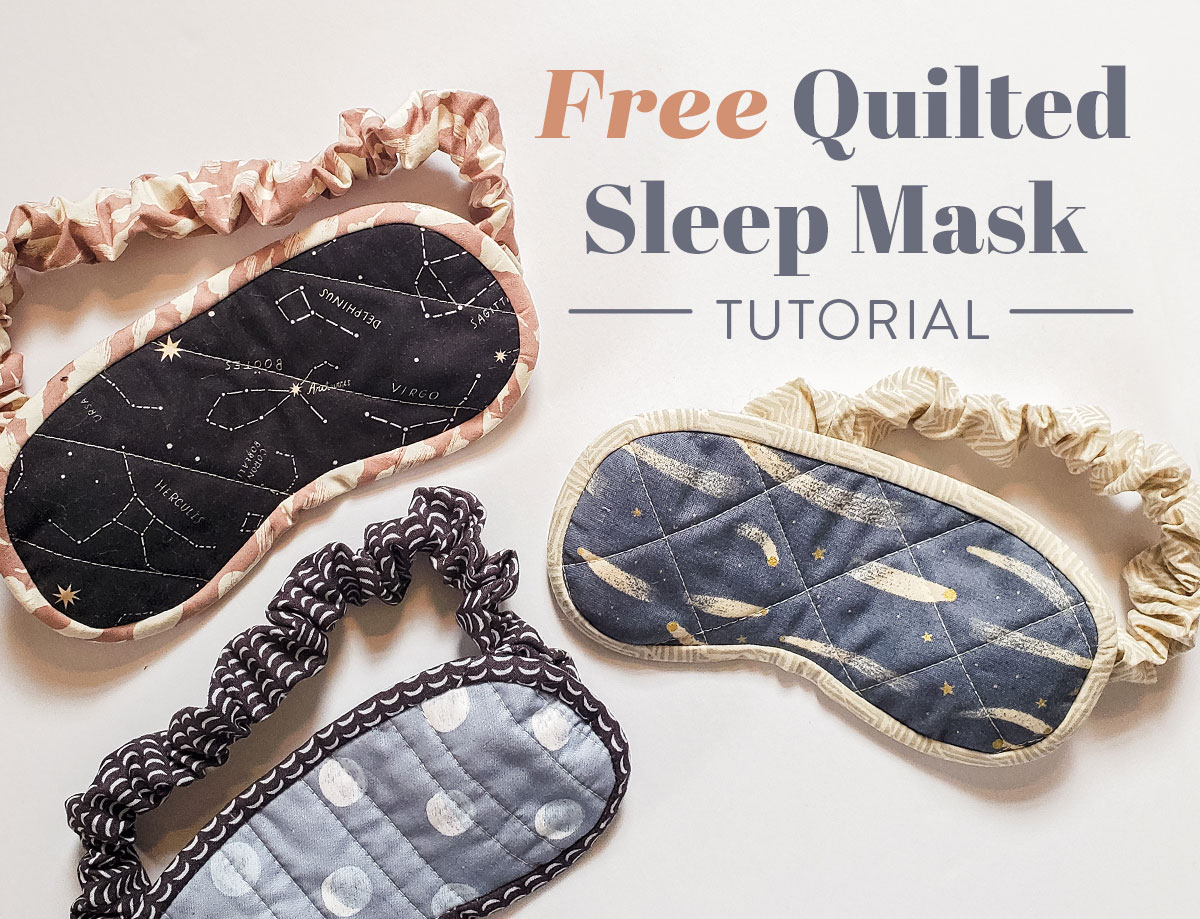 A 1/2-inch seam allowance and clipped curves give your mask a clean, professional finish.
Source: suzyquilts
A 1/2-inch seam allowance and clipped curves give your mask a clean, professional finish.
Source: suzyquilts
No-Sew Sleep Mask Methods for Beginners
No-sew masks are perfect for beginners, last-minute travel, or kids’ craft projects, and can be made in 15 minutes or less with no sewing experience. There are two reliable no-sew methods:
- Fusible interfacing method: Cut two identical outer fabric pieces and one interfacing piece (medium weight, cut 1/2 inch smaller than the outer pieces) using your pattern. Place the interfacing between the two outer fabric pieces, then follow the manufacturer’s instructions to iron it in place (usually 10–15 seconds with a hot, dry iron). Trim the edges to match your pattern, then apply a thin line of delicate fabric glue along the perimeter, leaving a 1-inch gap. Press the edges together, let dry for 30 minutes, then glue or sew the strap in place.
- Foam base method: Cut a 1/4-inch thick foam sheet to your pattern shape. Cut a piece of soft outer fabric 1 inch larger than the foam on all sides. Wrap the fabric around the foam, hot glue the edges to the back of the foam (use a low-temperature glue gun to avoid melting the fabric). Glue the strap ends to the back of the mask, reinforcing with extra glue for durability.
Pro tip: For no-sew masks made with fusible interfacing, avoid stretching the fabric while ironing, as this can cause the mask to warp and leave gaps for light. These masks will last 6–12 months with regular use, compared to 2+ years for sewn masks, but are perfect for temporary use or gifts.
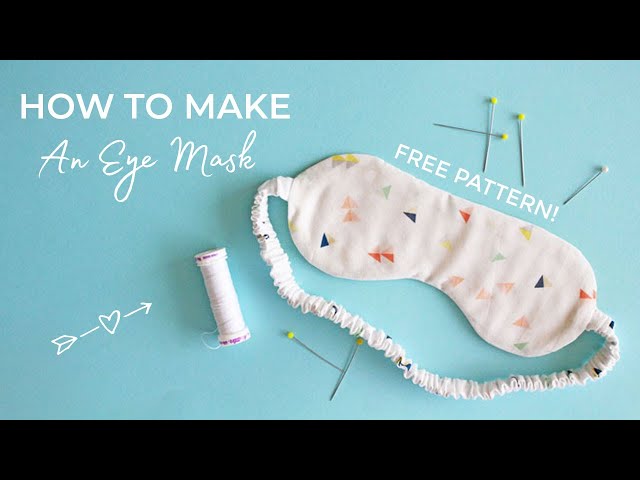 No-sew masks are perfect for beginners or last-minute travel needs.
Source: youtube
No-sew masks are perfect for beginners or last-minute travel needs.
Source: youtube
Fabric and Fill Options: Match Materials to Your Needs
The fabric and fill you choose will make or break your sleep mask’s comfort and effectiveness. Here’s a breakdown of the most popular options, tested over years of DIY projects:
Outer Fabric (Face-Side)
- 100% Silk Charmeuse: The gold standard for sensitive skin and hair. It’s smooth, temperature-regulating, and reduces friction that causes bedhead and skin creases in the morning. It’s also naturally hypoallergenic, making it ideal for people with acne or eczema. Downside: it’s more expensive ($10–$15 per yard) and requires gentle hand washing.
- Medium-Weight Cotton: Breathable, affordable ($3–$5 per yard), and easy to wash. It’s a great all-around option for everyday use, but can trap heat in warm climates. Look for 100% organic cotton to avoid harsh chemical dyes that irritate skin.
- Blackout Fabric: Made of tightly woven polyester, this blocks 100% of light when used in two layers. It’s perfect for people who sleep in bright rooms or work night shifts, but it’s not breathable, so it’s best for cooler climates or air-conditioned bedrooms.
- Bamboo Jersey: Soft, moisture-wicking, and naturally antibacterial, making it great for hot sleepers or people who sweat at night. It’s slightly stretchy, so it conforms to your face without pressure.
Fill Options
- Whole Flax Seeds: The most popular weighted fill, as they’re small, smooth, and moldable to your face. A 4–6 oz fill provides gentle pressure that activates the parasympathetic nervous system, reducing anxiety and helping you fall asleep faster. Studies show that gentle deep pressure stimulation from weighted sleep masks can reduce restlessness and improve sleep onset, according to research on sleep mask benefits from the National Sleep Foundation. Important: only use whole flax seeds, not cracked or ground, as they can leak through fabric over time. Do not microwave weighted masks unless the flax seeds are specifically labeled microwave-safe.
- High-Density Foam: Ideal for contoured masks, as it holds its shape and creates a raised edge around the eye cavities to block light without pressing on your eyes. Use 1/4-inch foam for a soft contour, or 1/2-inch foam for deeper cavities for side sleepers.
- Cotton Batting: A soft, unstructured fill for flat masks. It’s lightweight, breathable, and easy to wash, but doesn’t provide the light-blocking contour of foam.
Backing Fabric
Stick to soft, non-irritating options like cotton flannel, bamboo jersey, or silk. Avoid rough fabrics like burlap or stiff canvas, as they will be uncomfortable against your skin all night. You can also read our guide on how to wear sleeping mask.
 Testing fabric swatches against your skin first ensures no irritation during use.
Source: tillyandthebuttons
Testing fabric swatches against your skin first ensures no irritation during use.
Source: tillyandthebuttons
Care and Maintenance for Long-Lasting Use
Proper care will make your DIY sleep mask last 2+ years, even with nightly use. Follow these guidelines based on your materials:
- Unweighted masks: Machine wash on a gentle cold cycle with mild detergent. Use a mesh laundry bag to protect the elastic strap from snagging, a tip also recommended for cleaning soft sleep accessories like mattress protectors. Lay flat to dry, as hanging can stretch the fabric and distort the shape. Iron on a low heat setting if needed, using a pressing cloth for silk.
- Weighted masks: Remove the flax seed fill pocket before washing (most DIY pockets have a hidden opening for this). Wash the mask cover on a gentle cycle, and lay flat to dry. If your flax seed fill is labeled microwave-safe, heat it in 10-second bursts to refresh it, and let it cool completely before putting it back in the pocket. For delicate fabrics like silk, follow proper care for soft sleep textiles guidelines to avoid scorching or damaging the fibers.
- Strap replacement: Check the elastic or ribbon every 3–6 months for wear. If it’s lost stretch or has small tears, replace it immediately to avoid the mask slipping and breaking the light seal.
- Storage: Store your mask in a dry, cool place, away from direct sunlight, which can fade fabric over time. Avoid storing it in a damp bathroom, as moisture can cause mold on fabric and fill.
Never use bleach or fabric softener on silk or weighted masks, as these can damage the fabric and fill.
 Silk and weighted masks require gentle hand washing to preserve their shape and fill.
Source: youtube
Silk and weighted masks require gentle hand washing to preserve their shape and fill.
Source: youtube
Troubleshooting Common Sleep Mask Issues
Even with a perfect pattern, small fit issues can pop up. Here are the most common problems and how to fix them, based on feedback from people who have used my DIY patterns:
- Light leaks at the nose bridge: This is the most common issue. Fix it by adding a 1/2-inch wide strip of high-density foam or extra batting along the nose curve of the mask, or adjusting your pattern to have a deeper dip for the nose. You can also add a small adjustable nose wire (cut from a plastic-coated wire coat hanger) sewn into a small channel along the top edge of the mask to mold it to your face shape.
- Pressure on the eyes: If you wake up with sore eyes, your mask’s eye cavities are too shallow. Add 1/4-inch more foam to the edges around the eyes, or reshape the cavities to be deeper and wider. For flat masks, add an extra layer of batting over the eye area to reduce pressure.
- Strap slippage or ear pain: If the elastic is too tight or slides off, replace it with adjustable satin ribbon tied at the back of your head, or add a small plastic buckle to the elastic to adjust the length. For people with sensitive ears, look for wide satin straps (1 inch or wider) that distribute pressure more evenly.
- Mask feels too hot: Swap out fleece or thick cotton for silk, bamboo, or blackout fabric with a mesh lining. You can also add small ventilation holes along the sides of the mask (cover them with a layer of mesh to keep light out).
- Fill leaks from weighted masks: Always use a double-stitched fill pocket made of tightly woven fabric (avoid loose weaves like linen, which can let small seeds slip through). Test the pocket for leaks by shaking it vigorously before filling it with seeds.
 Adding a foam nose strip or deeper eye cavities fixes most common light leak issues.
Source: slostudio
Adding a foam nose strip or deeper eye cavities fixes most common light leak issues.
Source: slostudio
Frequently Asked Questions About Making a Sleep Mask
How long does it take to make a sleep mask?
Sewn masks take 30–60 minutes for beginners, and 15–20 minutes for experienced sewers. No-sew masks take 10–20 minutes, including drying time for glue or interfacing.
What fabric is best for sensitive or acne-prone skin?
100% silk charmeuse is the best option, as it’s smooth, hypoallergenic, and doesn’t trap bacteria like cotton can. If silk is out of your budget, organic bamboo jersey is a gentle, breathable alternative. Always wash new fabric before use to remove residual dyes and finishes.
Can I make a mask that blocks 100% of light?
Yes, if you use two layers of blackout fabric, add a deep nose curve, and ensure the mask fits snugly against your face without gaps. A contoured design with foam eye cavities will block more light than a flat design.
How do I add safe weight to a sleep mask?
Sew a small, double-stitched inner pocket into the mask, fill it with 4–6 oz of whole flax seeds, and sew the pocket shut. Never use cracked seeds, rice, or beans, as they can mold or leak when exposed to moisture. Only microwave weighted masks if the fill is explicitly labeled microwave-safe, and use 10-second bursts to avoid burns.
Is it safe to make a sleep mask for kids?
Yes, as long as you use soft, hypoallergenic fabrics, avoid small weighted fills (use 2–3 oz of flax seeds max for kids over 3), and use adjustable ribbon straps instead of elastic to avoid strangulation risks. Always supervise young children when using weighted masks.
Can I use old fabric from clothes or household items?
Absolutely! Upcycling old soft t-shirts, pillowcases, or flannel sheets is a sustainable, low-cost option. Just make sure the fabric is clean, free of harsh stains or perfumes, and pre-washed to remove any residual detergents.
What’s the best design for side sleepers?
Contoured masks with 1/4-inch foam eye cavities are ideal for side sleepers, as they prevent the mask from pressing into your eyes when you lie on your side, and the raised edges block light even when your face is turned.
How often should I replace my DIY sleep mask?
With proper care, a sewn sleep mask will last 2–3 years with nightly use. Replace it if the fabric is frayed, the elastic has lost stretch, or the fill is leaking. No-sew masks typically last 6–12 months.
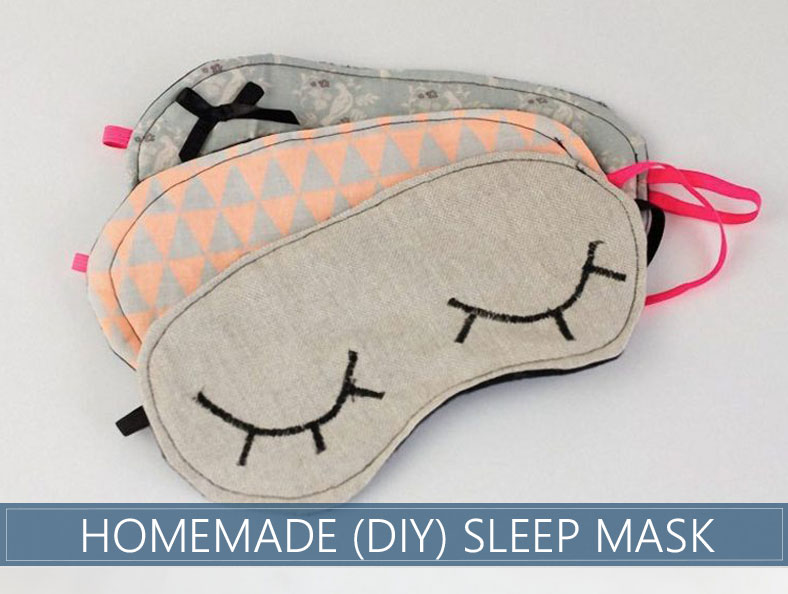 A well-fitted weighted mask provides gentle pressure to reduce anxiety and improve sleep onset.
Source: sleepadvisor
A well-fitted weighted mask provides gentle pressure to reduce anxiety and improve sleep onset.
Source: sleepadvisor
Final Tips for Your First DIY Sleep Mask
Making your own sleep mask lets you create a custom sleep solution tailored to your exact needs, from extra light blocking for night shift workers to gentle weight for anxiety relief. The most important step in any DIY mask project is testing the fit before you finish—hold the mockup or finished mask to your face in a dark room to check for light leaks, and adjust the pattern, strap length, or fill until it blocks all light without pressing on your eyes or causing discomfort. If you’re new to sewing, start with a simple flat no-sew mask to build confidence, then move on to a contoured weighted design once you’re comfortable with the basics. Ready to try another DIY sleep project? Check out our guide to upcycling old bedding into custom sleep accessories for more low-cost, sustainable rest tips. Have you made a DIY sleep mask before? Share your favorite fabric picks and fit tips in the comments below!
Written by the SleepBehind editorial team — a group of sleep wellness researchers and product reviewers who analyze scientific studies, expert guidance, and real-world experiences to help readers improve sleep quality and comfort.