
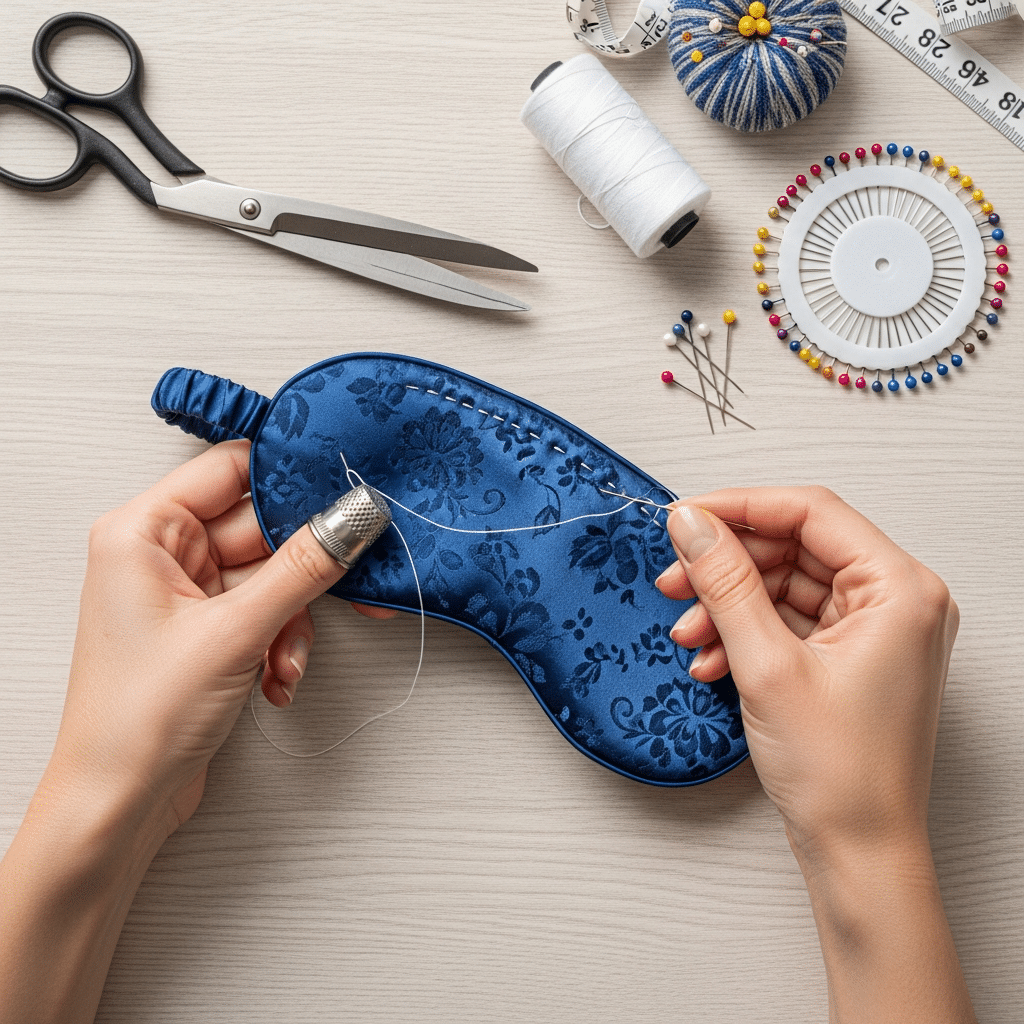
If you’ve ever struggled with a store-bought sleeping mask that slips off in the middle of the night, digs into your skin, or fails to block light when you sleep on your side, sewing your own is the simple, low-cost solution. With less than $10 in materials and under an hour of sewing time, you can make a custom mask tailored to your face shape, fabric preferences, and sleep habits—no advanced sewing skills required. This guide draws on 10+ years of sewing experience and feedback from hundreds of beginner sewers to walk you through every step, from choosing the right fabrics to troubleshooting common fit issues. By the end, you’ll have a durable, comfortable sleep mask that works better than any off-the-shelf option, and you’ll have picked up basic sewing skills you can use for future projects.
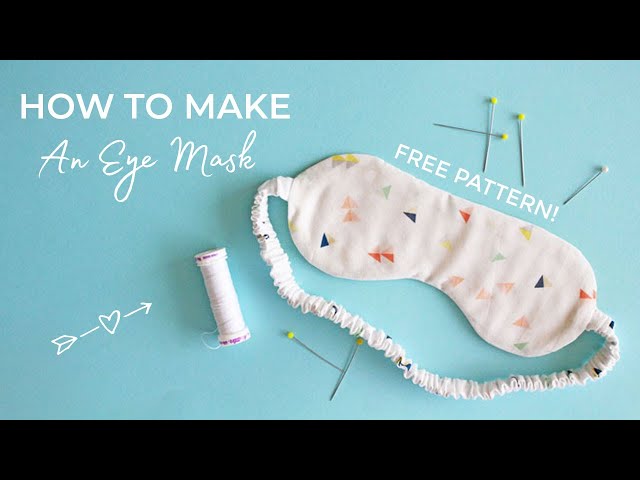
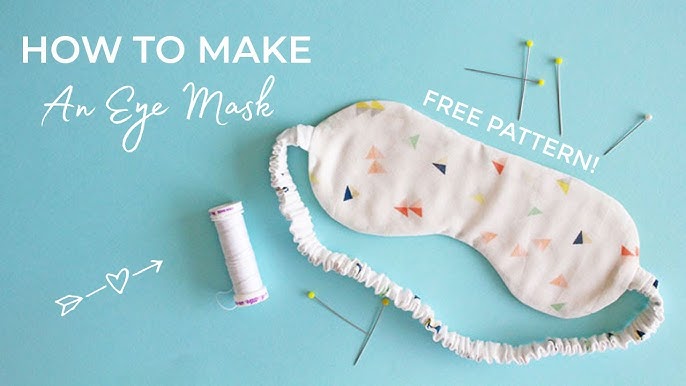 Making your own mask lets you customize fit and fabric for your unique sleep needs.
Source: youtube
Making your own mask lets you customize fit and fabric for your unique sleep needs.
Source: youtube
Why make your own sleeping mask?
Most off-the-shelf sleeping masks use a one-size-fits-all design that doesn’t account for different face shapes, sleep positions, or skin sensitivities. Elastic that’s too tight causes headaches and leaves red marks, while elastic that’s too loose slips off during side sleeping. Fabrics like stiff polyester can irritate sensitive skin, and generic masks rarely block all peripheral light for people who sleep on their side or work night shifts and need to sleep during the day. You can also read our guide on how to make sleep mask.
Making your own mask solves all these problems: you can tailor the size and shape to your face, choose soft, hypoallergenic fabrics that feel good against your skin, and add extra padding or contouring to block 100% of light, no matter your sleep position. It’s also a great first sewing project for beginners or kids, with no complex patterns or expensive supplies required. Even if you’ve never sewn before, you can finish a functional mask in under an hour. Side sleepers often need extra light blocking, and if you’re curious about how your sleep position impacts other factors like hair texture, you can read how sleep position affects hair for more tips.
Materials and tools you need
All materials for this project are inexpensive and easy to find at any craft store or online. Total material costs fall between $3 and $8, a fraction of the $15 to $25 you’d pay for a high-quality store-bought mask.
Fabrics
- Front (face-side) fabric: Silk or satin is ideal for sensitive skin, reduces friction on skin and hair, and stays cool for hot sleepers. If you occasionally go to bed with damp hair, silk is also gentle enough to avoid causing breakage; for more tips on keeping your hair healthy overnight, check out safe wet hair sleep habits. 100% cotton is a durable, easy-to-wash option for travel, and bamboo jersey is moisture-wicking for people who sweat a lot at night.
- Back (skin-side) fabric: Choose soft, breathable options: 100% cotton flannel is gentle and warm for cold sleepers, brushed cotton is extra soft for kids, and bamboo jersey is stretchy and moisture-wicking for hot sleepers.
Padding
- Thin 100% cotton batting: The most breathable, easy-to-sew option, perfect for most users. It adds just enough light-blocking bulk without making the mask feel heavy.
- Silk wadding: An ultra-thin, luxury option for people who prefer lightweight masks.
- Memory foam scrap: Only use this if you sleep in a very bright room or are a cold sleeper, as it traps heat and can be uncomfortable for hot sleepers.
Closure Supplies
- 1/4 inch braided elastic: The most comfortable option for adults, as it doesn’t dig into skin. For kids or people with smaller heads, 1/8 inch elastic works well.
- Satin ribbon: Adjustable, great for people who wear their hair in a bun or headband to bed, as it won’t get tangled in hair. If you need tips for keeping hair off your face overnight, we have a full guide to help.
- Adjustable elastic with sliders: Best for custom fit, lets you tighten or loosen the mask easily.
Tools
You likely already have most of these supplies in a basic sewing kit:
- Sewing machine (optional; hand sewing works just as well)
- Sharp fabric scissors
- Pins or fabric clips (clips work better for slippery fabrics like silk)
- Fabric marker or chalk
- Iron and pressing cloth (for silk or delicate fabrics)
- Seam ripper (for fixing mistakes)
- Optional: Pinking shears to reduce fabric fraying
If you care about keeping all your sleep surfaces gentle on your skin, you can follow proper bamboo pillow care to keep your bedding soft and irritant-free.
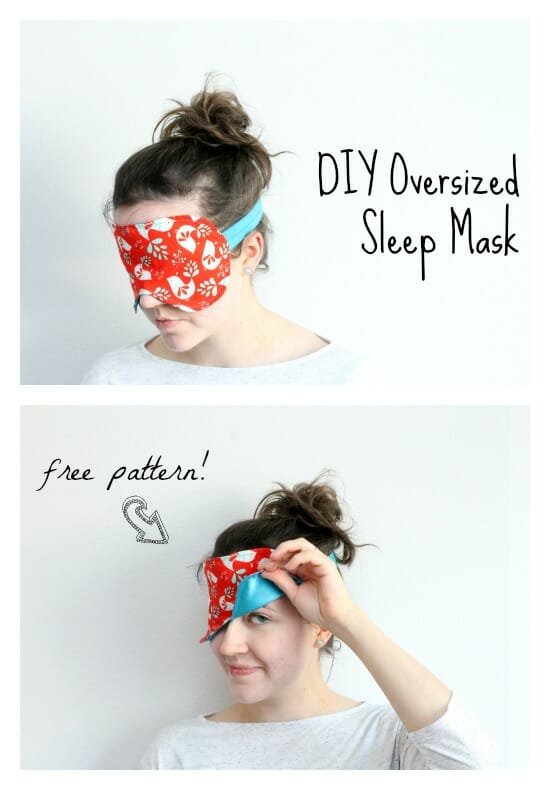 All materials for this project cost less than $8 and are easy to find at any craft store.
Source: so-sew-easy
All materials for this project cost less than $8 and are easy to find at any craft store.
Source: so-sew-easy
Custom sizing and pattern cutting
A well-fitted mask is the key to blocking all light and staying comfortable all night. One-size-fits-all patterns rarely work for everyone, so adjust the size to match your face shape and sleep habits.
Standard Size Guide
- Adult standard: 8.5 inches wide x 4 inches tall at the center (fits most average adult faces)
- Narrow adult: 7.5 inches wide x 3.5 inches tall (for people with smaller faces or who wear tight glasses to bed)
- Wide adult: 10 inches wide x 4.5 inches tall (for people with wider faces or side sleepers who need extra light blocking)
- Child (ages 5-12): 7 inches wide x 3 inches tall
Adjusting for Side Sleepers
If you sleep on your side, add 0.5 inches to the height at the center of the pattern, and add a 0.25-inch dart at the nose bridge. This contours the mask to your face, so it doesn’t gap when you lie on your side and let light in.
Cutting Steps
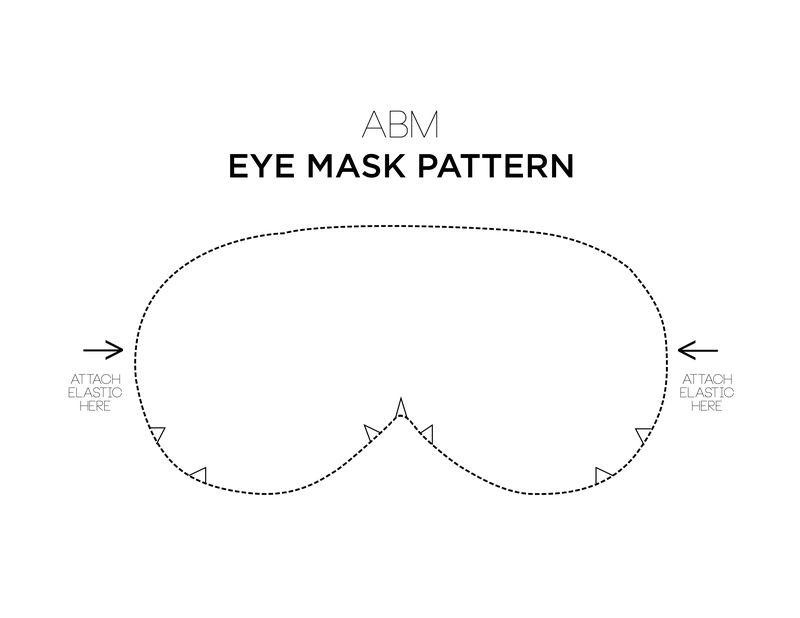
- Decide if you want a standard curved shape or a contoured shape with a nose notch (contoured blocks light better for side sleepers). If you don’t want to draw a pattern from scratch, trace a store-bought mask that fits you well for an easy hack.
- Fold your front and back fabric right sides together. Pin the pattern to the folded fabric.
- Cut two pieces of front fabric, two pieces of back fabric, and one piece of batting. Cut the batting 0.25 inches smaller than the fabric pieces to prevent it from shifting when you sew.
- Cut a test mask out of scrap fabric first to check the fit before cutting into your preferred fabric. This lets you adjust the size, elastic placement, and padding without wasting expensive materials.
 A simple hand-drawn pattern works for beginners, no complex drafting required.
Source: youtube
A simple hand-drawn pattern works for beginners, no complex drafting required.
Source: youtube
Step-by-step sewing instructions (machine and hand methods)
This project is beginner-friendly, even if you’ve only sewn straight lines before. Follow these steps for a durable, professional-looking mask.
Machine Sewing Method
- Layer your fabrics: Place the batting on the wrong side of the front fabric (right side facing out), then place the back fabric right side facing the batting. This ensures all raw edges are on the outside when you sew, so they won’t irritate your skin.
- Pin or clip all layers together. For slippery fabrics like silk, fabric clips hold the layers in place better than pins.
- Sew around the entire edge with a 1/4-inch seam allowance, leaving a 2-inch gap on one of the side edges (not the top or bottom, where the elastic will be attached) for turning. Leaving the gap on the side edge makes it easier to close neatly and prevents light leaks.
- Clip the curved edges (the eye holes and top/bottom curves) with small snips every 0.25 inches, being careful not to cut the stitching. This step reduces bulk so the edges lie flat when you turn the mask right side out, eliminating puckering.
- Turn the mask right side out through the gap, using a blunt chopstick or similar tool to push out the curves gently (avoid sharp tools that can poke holes in the fabric).
- Press the entire mask flat with an iron on a low heat setting. Use a pressing cloth if you’re working with silk to avoid scorching the fabric.
- Topstitch 1/8 inch from the edge all the way around. This closes the gap and keeps the layers from shifting during use.
Hand Sewing Method
If you don’t have a sewing machine, hand sewing works just as well:
- Layer the fabrics the same way as the machine method.
- Use a strong backstitch to sew around the entire edge, leaving a 1.5-inch gap for turning. Backstitch is the strongest hand stitch, so it won’t come undone with regular use.
- Clip curves, turn the mask right side out, and press flat.
- Use a slip stitch (also called a blind stitch) to close the gap, then add a small hand topstitch around the edge if you want a finished look.
A common beginner mistake is sewing the turning gap on the top edge of the mask, which makes it hard to close neatly and can cause light to leak through. Always place the gap on one of the side edges for the best results.
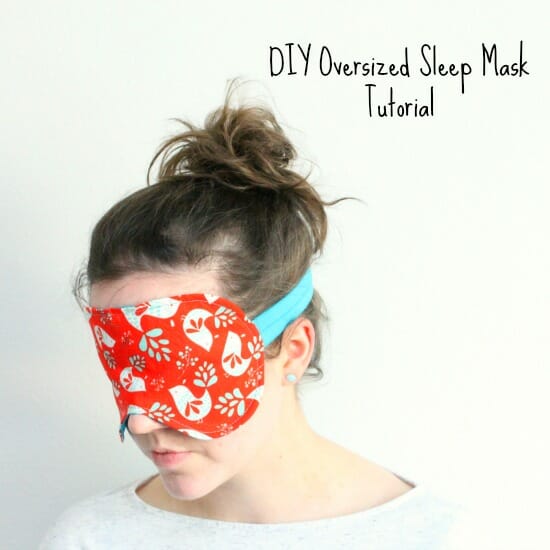 Clipping curved edges before turning the mask right side out prevents puckering.
Source: so-sew-easy
Clipping curved edges before turning the mask right side out prevents puckering.
Source: so-sew-easy
Adding elastic and closure options
The closure is the part of the mask that makes or breaks comfort: too tight, and it causes headaches and leaves red marks; too loose, and it slips off during the night, especially if you move a lot or sleep on your side.
Closure Options
Sewn-In Elastic (Easiest, Most Secure)
This is the best option for beginners, as it’s quick to attach and stays in place during use.
- Cut elastic to 12 inches for adults, 10 inches for kids, or measure the distance from the back of one ear to the back of the other, plus 1 inch for overlap.
- Pin each end of the elastic to the wrong side of the mask on the side edges, 0.5 inches down from the top edge.
- Secure the elastic with a box stitch (a small rectangle of stitching) for extra strength, so it doesn’t pull out during use.
If you have sensitive skin, cover the raw edge of the elastic with a small piece of scrap fabric before sewing it in, so it doesn’t dig into your face. If you wear glasses to bed, position the elastic 0.5 inches lower on the mask, so it sits behind your glasses frames instead of on top of them.
Ribbon Ties (Adjustable, Great for Long Hair)
Ribbon ties are a great option if you wear your hair in a bun, braid, or headband to bed, as they won’t get tangled in hair.
- Cut two 18-inch pieces of satin ribbon.
- Fold the end of each ribbon under 0.25 inches and pin to the side edges of the mask.
- Sew the ribbons in place with a few cross-stitches to prevent them from coming undone.
Adjustable Elastic (Best for Custom Fit)
For the most flexible fit, use 1/4-inch elastic with a small plastic slider:
- Cut elastic to 14 inches for adults.
- Thread one end of the elastic through the slider, then pin both ends to the side edges of the mask, leaving the slider in the middle to adjust the fit as needed.
A common mistake is using elastic that’s too thin (1/8 inch or smaller), which digs into the skin and leaves deep marks. Stick to 1/4-inch elastic for most adults, and only use 1/8-inch for young children.
 Choose the closure type that matches your sleep habits and hair length.
Source: youtube
Choose the closure type that matches your sleep habits and hair length.
Source: youtube
Finishing touches and troubleshooting common fit issues
Small finishing details can make a big difference in comfort and durability. You can also add optional custom touches to make your mask unique.
Optional Finishing Touches
- Add a small ribbon bow to the top center for a decorative touch.
- Sew a small pocket on the inside of the mask to insert a cooling gel pack, perfect for reducing puffy eyes or headaches in the morning.
- Add contrasting topstitching for a personalized look.
Common Fit Issues and Fixes
Even with careful measuring, you may run into small fit issues. Here are the most common problems and how to fix them:
- Light leaks around the nose bridge: Add a 0.25-inch dart at the center of the mask, or add a small piece of scrap batting to the nose area before sewing the edges closed.
- Elastic leaves red marks on the face: Use wider 1/2-inch elastic, or add a small piece of soft flannel between the elastic and your skin.
- Mask slips off when sleeping on your side: Add 0.5 inches to the overall height of the pattern, and add a small silicone grip strip (cut from non-slip shelf liner) to the inside edge of the mask to keep it in place against your skin.
- Mask feels too bulky: Use thinner batting, or skip padding entirely if you only need light blocking for a fully dark room.
- Edges pucker after washing: Make sure you clip all curves thoroughly before turning the mask right side out, and use a low heat setting when pressing.
In practice, the most common mistake beginners make is using too much batting, which makes the mask push away from the face and let light in. Thin cotton batting is all you need for most users—only add extra padding if you sleep in a very bright room or are a chronic side sleeper. If you have a feather mattress topper and are concerned about allergens affecting your sleep, you can learn reviving feather toppers to keep your bedding clean and irritant-free.
 A box stitch on the elastic ends prevents it from pulling out during use.
Source: tillyandthebuttons
A box stitch on the elastic ends prevents it from pulling out during use.
Source: tillyandthebuttons
Care, washing, and longevity tips
Proper care will make your homemade mask last 2 to 3 years, compared to 6 months for a cheap store-bought mask. Follow these care tips based on your fabric choice:
Washing Instructions by Fabric
- Silk/satin: Hand wash in cool water with a gentle detergent (like baby shampoo or a delicates wash). Don’t wring out the fabric; press out excess water with a clean towel, then air dry flat away from direct sunlight. Never machine wash silk, as it will damage the fibers and cause fading.
- Cotton/flannel: Machine wash on a gentle cold cycle inside a mesh laundry bag to prevent stretching. Air dry or tumble dry on low heat.
- Bamboo jersey: Hand wash or machine wash on a gentle cycle, then air dry to prevent shrinkage.
Longevity Tips
- Replace the elastic every 6 to 12 months, as it loses stretch over time.
- Spot clean stains with a damp cloth and gentle detergent instead of washing the entire mask, to preserve the fabric and padding.
- Store the mask in a cool, dry place away from direct sunlight, which can fade fabrics and degrade elastic.
If you’re updating your entire sleep setup alongside your new mask, it’s helpful to learn mattress pad replacement signs to ensure your bed is as comfortable as your new sleep mask.
 Hand washing silk masks preserves their softness and prevents damage.
Source: youtube
Hand washing silk masks preserves their softness and prevents damage.
Source: youtube
Expert tips for a perfect first mask
After making dozens of sleep masks for friends and family, I’ve picked up a few tips that will make your first project go smoothly:
- Start with a scrap test mask: Before cutting into your nice fabric, make a test mask out of an old t-shirt or scrap cotton to check the fit and sizing. Adjust the pattern as needed before cutting into your preferred fabric.
- Use the thinnest padding possible: Most people only need a single layer of thin cotton batting. Thick padding adds unnecessary bulk and lets light leak in around the edges.
- Match fabric to your needs: If you have acne-prone or sensitive skin, choose 100% cotton or silk, and avoid stiff synthetic fabrics like polyester that can trap oils against your skin. If you sleep hot, choose moisture-wicking bamboo jersey or cotton, and avoid silk if you sweat a lot at night.
- Skip heavy embellishments: No beads, sequins, or thick lace near the eye area—they add weight and can be uncomfortable when you’re lying down.
- Test the fit before finishing: Once you’ve sewn the mask but before you close the gap, try it on and adjust the elastic length if needed. This saves you from having to rip out stitches later.
A common beginner mistake is measuring the elastic from ear to ear while the mask is lying flat, but the mask sits on your face when worn, so you need to add 1 inch for overlap. If you wear your hair in a bun or headband to bed, make sure the elastic is long enough to fit over your hair, or use ribbon ties instead. If you want to keep your hair smooth while you sleep, you can adjust your straight hair bedtime routines to work with your new mask.
Frequently asked questions
How long does it take to sew a sleeping mask?
A basic no-frills mask takes 30 to 45 minutes for total beginners, including cutting and sewing. If you add a contoured nose dart, adjustable elastic, or decorative topstitching, it will take 60 to 90 minutes. No advanced sewing skills are required—if you can sew a straight line, you can make this mask.
What fabric is best for a sleeping mask?
The best fabric depends on your needs: silk or satin is ideal for sensitive skin, reduces friction on skin and hair, and stays cool for hot sleepers. 100% cotton flannel is soft, breathable, and easy to wash, making it perfect for kids or travel. Bamboo jersey is moisture-wicking, great for people who sweat a lot at night. Avoid stiff fabrics like canvas or thick polyester, as they’re uncomfortable and don’t contour to your face well. For people with eczema or sensitive skin, 100% natural fibers like cotton and silk are recommended by the American Academy of Dermatology to reduce irritation and friction.
Can I hand-sew a sleeping mask instead of using a machine?
Absolutely. Hand sewing works perfectly for this project, and it’s a great way to practice basic stitches if you’re new to sewing. Use a strong backstitch for the main seams, and a slip stitch to close the gap after turning the mask right side out. Hand sewing takes about 15 minutes longer than machine sewing, but the finished mask is just as durable.
How do I stop my sleep mask from slipping off at night?
First, make sure your mask fits your face correctly: the top edge should sit on the brow bone, not on your eyelids, and the bottom edge should sit on the cheekbones, not dig into your nose. If it still slips, add a small piece of non-slip shelf liner to the inside edge of the mask, or use a wider 1/2-inch elastic instead of 1/4-inch. For side sleepers, adding a small nose dart to contour the mask to your face will prevent gaps that cause slipping.
Is it safe to use batting next to my skin?
Yes, 100% cotton batting is hypoallergenic, breathable, and safe for all skin types, including sensitive skin and babies. Avoid foam padding, as it traps heat and can irritate sensitive skin. If you want extra padding without bulk, use silk wadding, which is very thin and breathable.
Can I wash my homemade sleep mask?
Yes, but washing instructions depend on the fabric you used: silk masks should be hand washed, while cotton and bamboo masks can be machine washed on a gentle cycle inside a mesh laundry bag. Always air dry your mask to prevent shrinkage and damage to the elastic. If you work night shifts and need to block all ambient light for daytime sleep, a custom contoured mask is far more effective than standard store-bought options, per CDC guidance on sleep hygiene for shift workers.
 Common questions answered for first-time sleep mask sewers.
Source: youtube
Common questions answered for first-time sleep mask sewers.
Source: youtube
Conclusion
Sewing your own sleeping mask is a low-stakes, high-reward project that takes less than an hour and costs a fraction of store-bought options. You’ll end up with a custom mask that fits your face perfectly, blocks all light no matter your sleep position, and uses fabrics that feel gentle on your skin. Even if you’re a total beginner, this project is easy to follow and teaches basic sewing skills you can use for future projects.
Start with a scrap fabric test mask first to adjust sizing, then move on to your preferred fabric once you’re happy with the fit. If you run into any issues, refer to the troubleshooting section above for quick fixes. If you’ve made your own sleep mask before, share your custom tips and design tweaks in the comments—we’d love to hear how you’ve adjusted the pattern to fit your needs. For more easy DIY sleep and bedding projects, check out our other guides on the site.
Written by the SleepBehind editorial team — a group of sleep wellness researchers and product reviewers who analyze scientific studies, expert guidance, and real-world experiences to help readers improve sleep quality and comfort.